How to use the schedule waitlist?
Creating a waitlist entry:
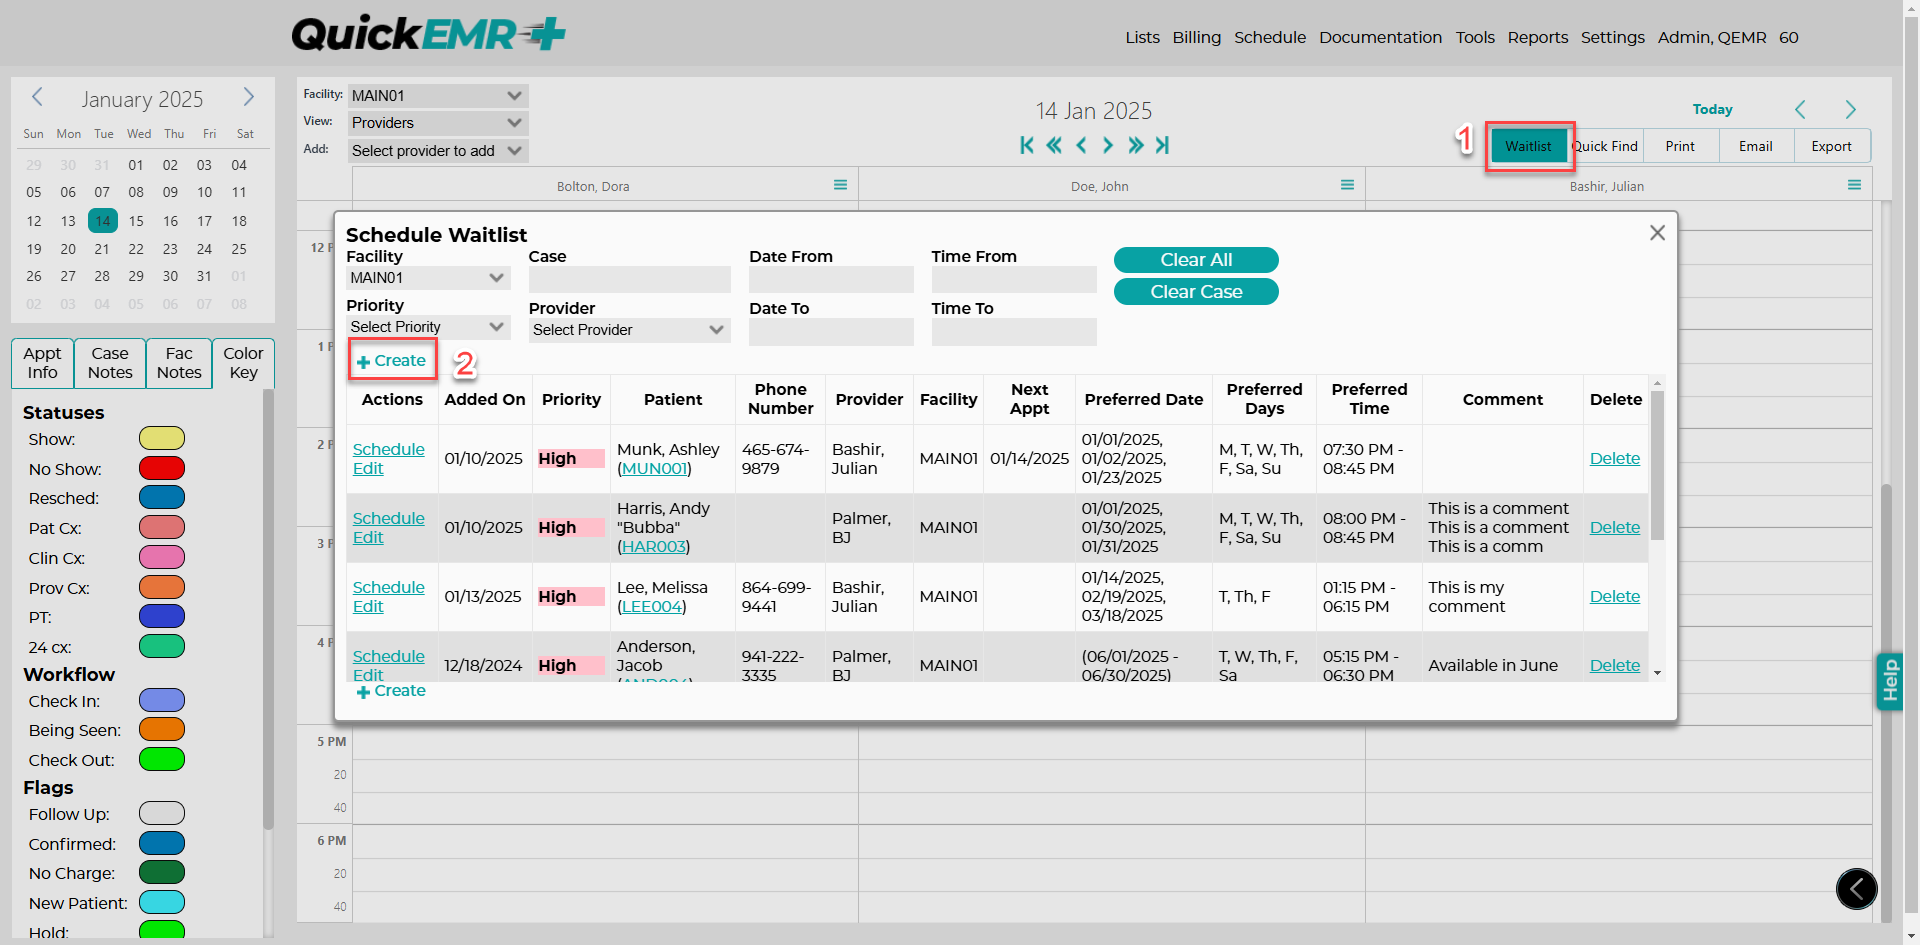
To create a waitlist entry, first navigate to the appointment book.
1. Locate the Waitlist Button: In the top-right corner of the scheduler, you will find the Waitlist button. Click to open the waitlist.
2. Create a New Entry: Click the Create button within the waitlist form. This action opens a modal window where you can input details for a new waitlist entry.
Date Fields
When the create form opens, users have two options for specifying dates in the waitlist form:
2. Date Period: Specify a date range that indicates the patient's availability.
Time fields
Similar with the dates, there will also be two options for Preferred Time.
2. Time Period: Enter a specific time range during which the patient is available.
Fields left empty
If any fields such as provider, preferred date, preferred time, or preferred days are left empty, they will automatically default to "Any" in the waitlist table.
Scheduling an appointment from the waitlist
There are multiple ways to schedule an appointment from the waitlist. Let's cover the first one, which is when a patient cancels an appointment.
Filling in a cancellation from the waitlist
If an appointment has a designated cancellation status, click on the appointment and users will find a "Waitlist' link located to the right
1. Click on the Waitlist link and we will see that our filters auto search for patient with availability for that same provider, day, and time.
1. Click on the Waitlist link and we will see that our filters auto search for patient with availability for that same provider, day, and time.
2. The waitlist form opens, where we can see our filters auto-populate for us. Adjust the filters as needed to broaden your search.
3. When you confirm the patient, click Schedule.
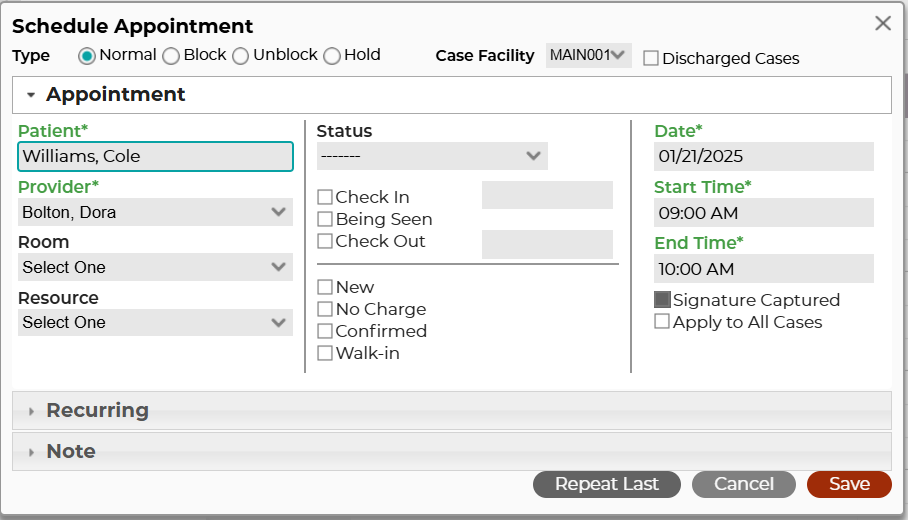
When we click schedule, the waitlist form will close and the appointment form will open.
When we click schedule, the waitlist form will close and the appointment form will open.
You will see the values for provider, date, start, and end time auto populate with the same data as the previous appointment.
* Please note that once a user saves the appointment, the waitlist entry will be deleted.
* Please note that once a user saves the appointment, the waitlist entry will be deleted.
Scheduling in a New Appointment Slot
The other way of scheduling a patient from the waitlist is for new appointment slots.
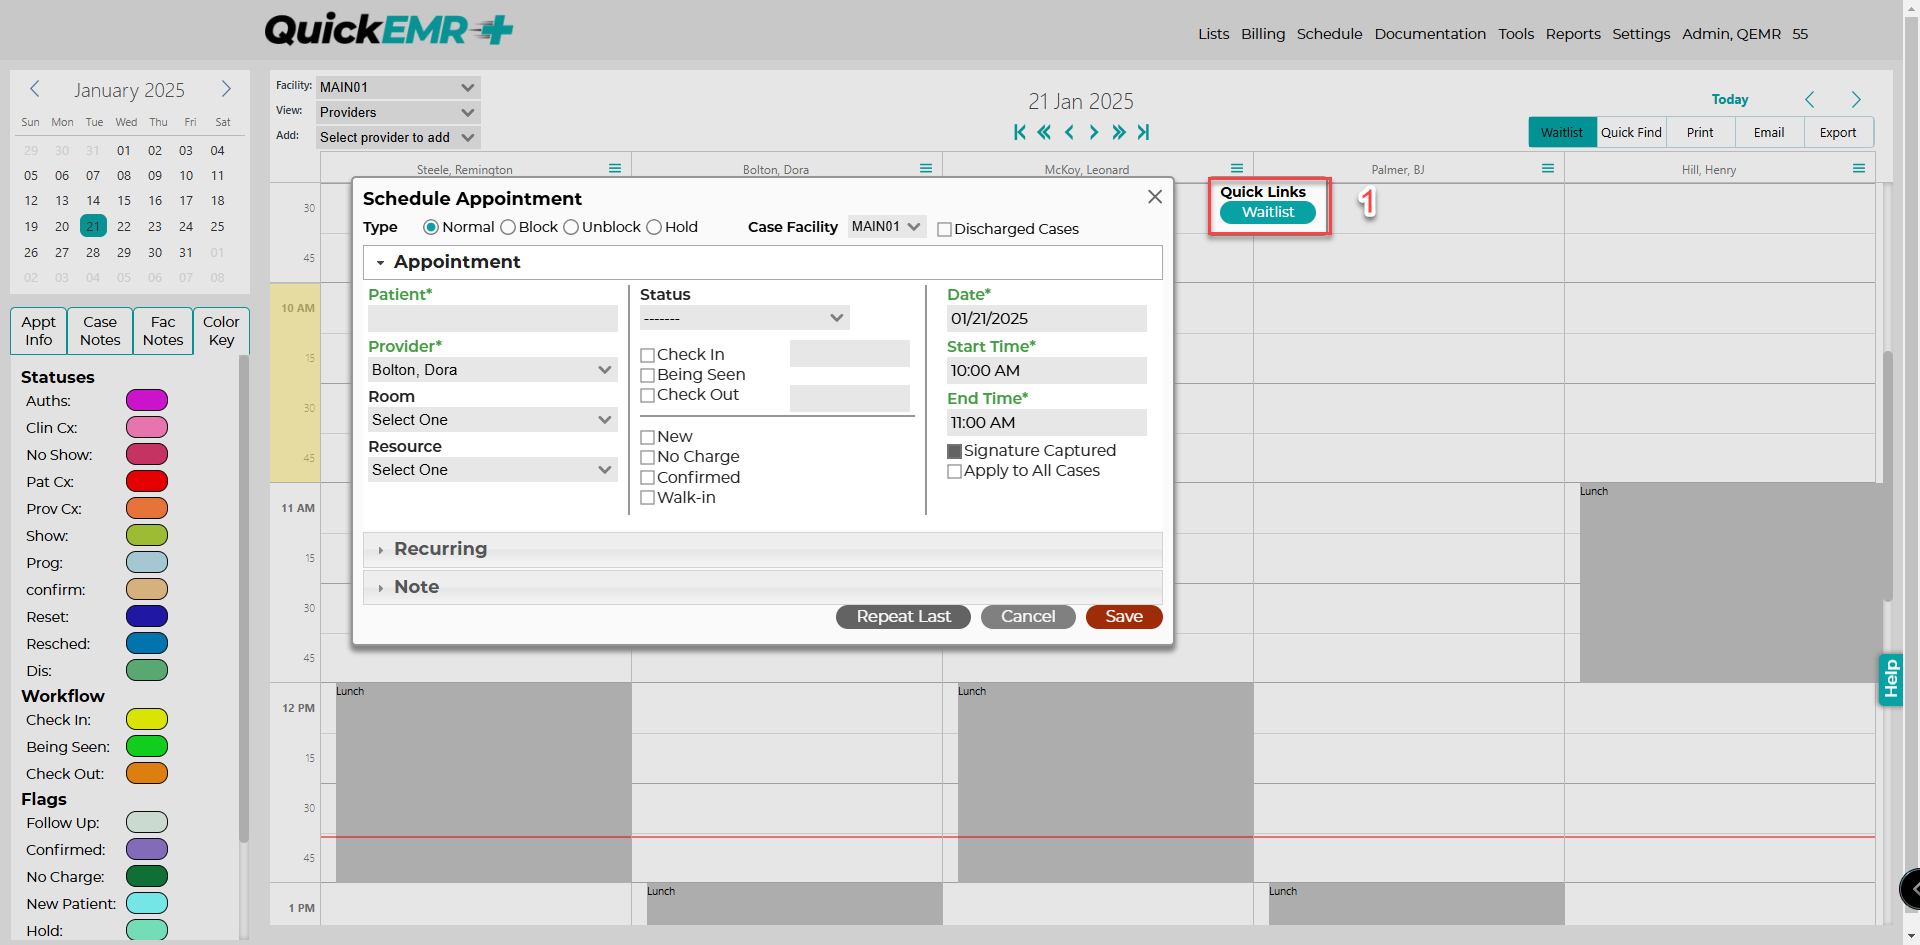
Schedule an appointment in an empty slot anywhere on the schedule.
1. We will also see the waitlist link display when the appointment form opens.
1. We will also see the waitlist link display when the appointment form opens.
2. Again the filters will auto-populate for us. Adjust as necessary.
3. Once the patient is confirmed, press the schedule button to schedule the patient.
When we click schedule, the waitlist form will close and the appointment form will open.
Once more, you will see the values for provider, date, start, and end time auto populate for us and ready to be scheduled.
Once more, you will see the values for provider, date, start, and end time auto populate for us and ready to be scheduled.
Scheduling multiple patients
1. If a user needs to schedule multiple patients at the same time, click the waitlist button on the top right of the appointment book.
2. From here, when a user clicks schedule, we will see the appointment form open and the waitlist form remains open for additional scheduling.
2. From here, when a user clicks schedule, we will see the appointment form open and the waitlist form remains open for additional scheduling.
Auto-populate data from waitlist entry
When scheduling this way:
Auto-populate data from our filter values
Discharged Cases
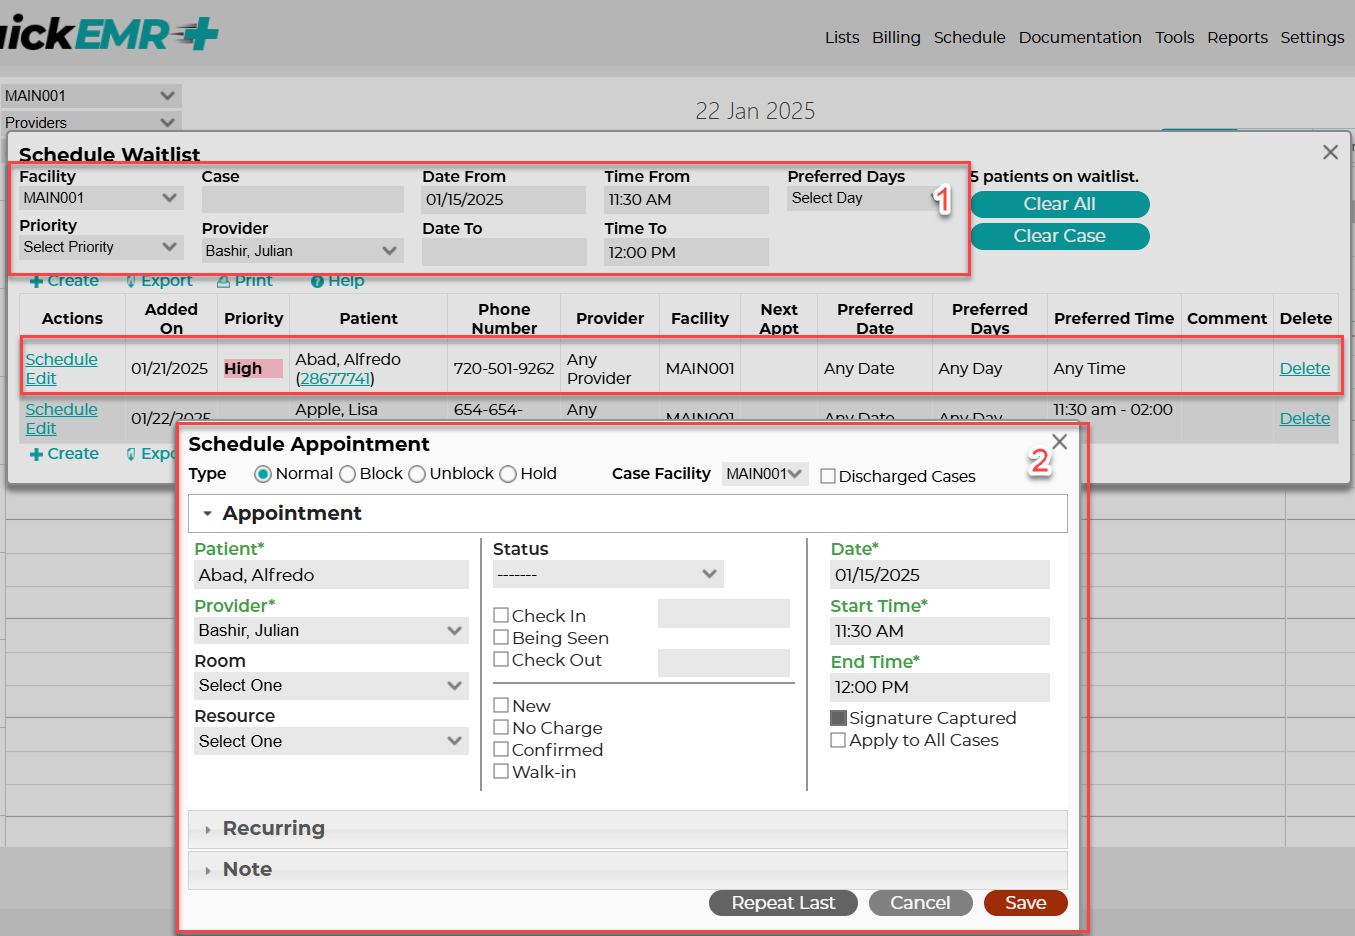
- The provider and preferred time fields from the waitlist entry will auto-populate in the appointment form.
- The appointment date defaults to the current date.
Auto-populate data from our filter values
Furthermore, if the table values are undefined and provider, date, or time is set to "Any" on the waitlist entry:
1. Fill in the filter values accordingly and then click schedule on a patient.
2. These filter values will auto-populate into the appointment form.
If no filter values are provided:
The appointment date defaults to the current date.
If the preferred time is unavailable, the start time defaults to the nearest hour from the user's current time.
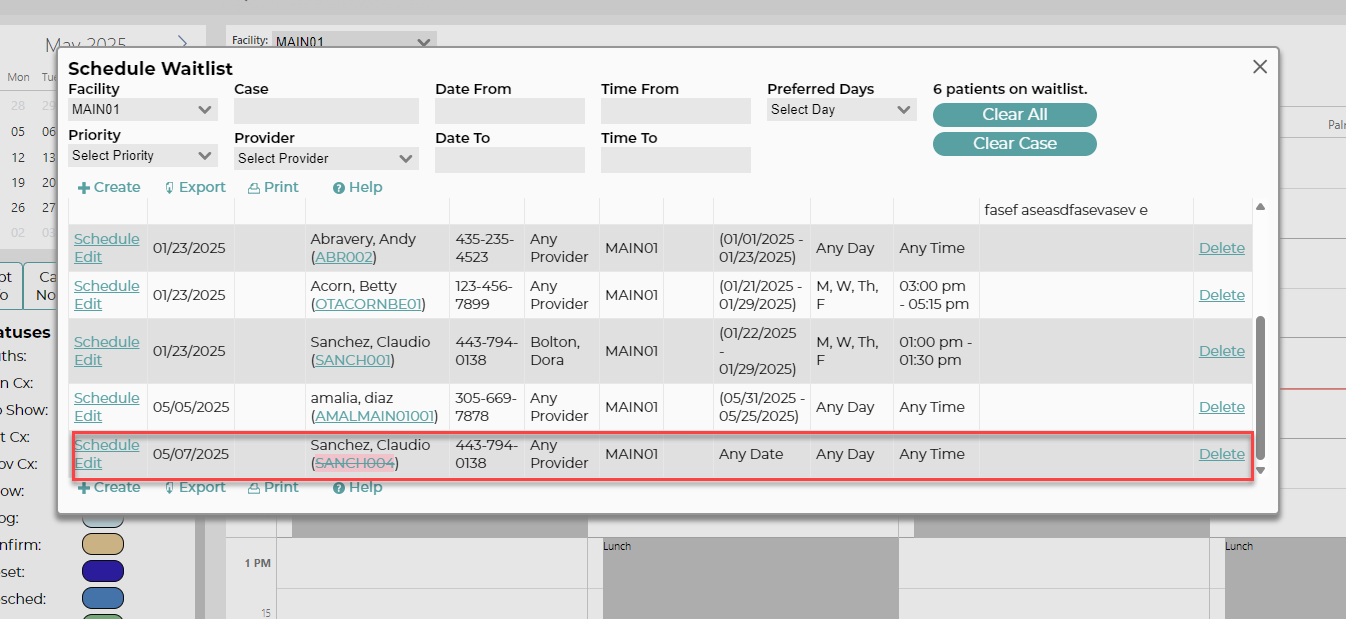
Discharged Cases
Any cases that have been discharged after the have been added to the waitlist will show as highlighted red with a strikethrough.