FOTO Integration Part 1: Set up your system
1. Turn on Foto and set the API Key in "Settings" => "Add-Ons" => "Outcomes Type". Select the MIPS and MIPS Outcomes check-boxes on the same page if relevant. *Correction from video. The Sign-Up link has been updated to use the correct sign-up form.
Step 2:
Step 2:
2. Map the FOTO user to QuickEMR at "Lists" => "Users" => {desired username} => "Settings" => "Outcomes Username". Set this to the FOTO "Employee ID". The value must match exactly for every provider and support staff.
Step 3: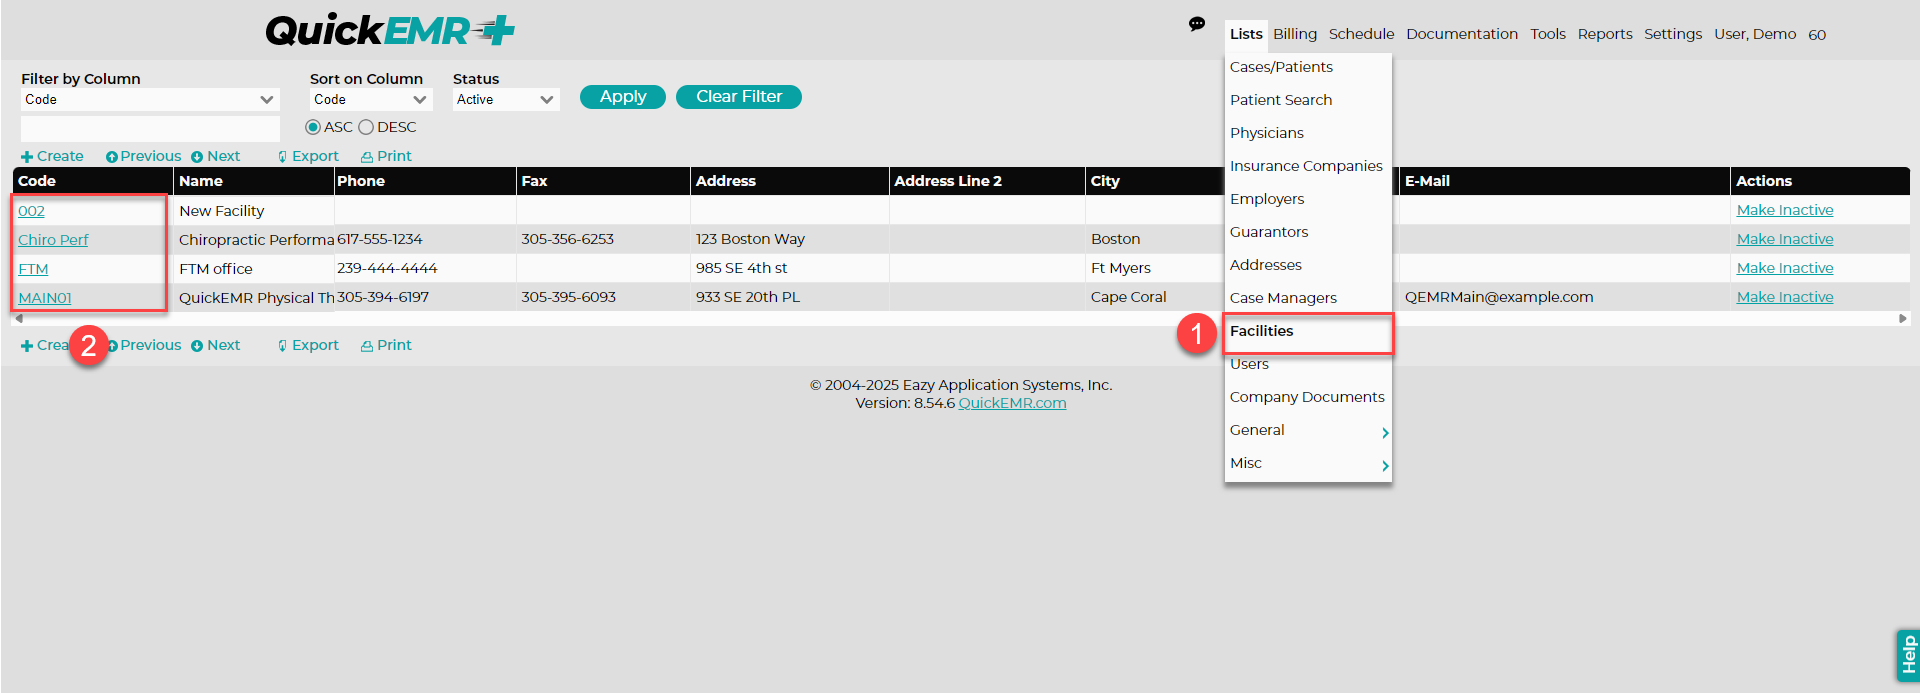
3. Map the QuickEMR Facility to the FOTO Clinic. Find the QuickEMR Facility "Code" at "Lists" => "Facilities" the code is on the first column of the list. Set this value in the FOTO Clinic "External Clinic ID".
Step 4:
Step 4:
4. Make sure that your FOTO settings allow API integration. Inside FOTO select "Integration" => "API Incoming Patient Autolinking" Select all 3 boxes "Enable Autolinking", "Automatically Import Patients", and "Automatically Cascade Updates". If you have "API IP Filtering" enabled make sure "162.217.193.67" is on the list, this setting is not recommended as the IP is subject to regular changes without notice or updates to this document. The API Integration may have additional settings that can only be configured by FOTO support. Please call FOTO to confirm they have the appropriate settings enabled for QuickEMR.
Related Articles
FOTO Integration Part 2: Usage
Mappings QuickEMR Patient => FOTO Patient QuickEMR Case => FOTO Episode QuickEMR Note => FOTO Encounter Create a new patient or visit an existing patient not connected to FOTO. FOTO requires several fields that are optional in QuickEMR. Before ...APTA Mips API Integration
You must be using QuickEMR Version 8 to integrate with APTA. Obtain SFTP information and enter it at “Settings” => “Documentation” => “Outcomes Type” => “APTA” => “APTA Host” and save. Past data may be manually exported by visiting “Reports” => ...How to set up credit card payment system within QuickEMR?
Sign Up To sign up for Gravity Payments, click here. How to get started: The first step to setting up the credit card payment system is to contact Gravity Payments. You will need to create an account with Gravity, who will then send over your account ...QEMR Native (Self Pay Billing Management System)
**This system is for facilities that ONLY accept cash-pay patients and is not yet intended for facilities that are submitting claims to insurances** Enabling QuickEMR Native: Where to go? 1. The Quickemr Native system can be enabled by going under ...QuickEMR Note Validation
Note Validation Permission to Complete To allow a user to complete a note, the user must be given permission in the user settings. 1. Navigate to Lists --> Users 2. Select the user, followed by selecting the Settings tab on the left side of the ...